
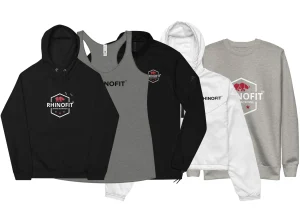
Are you looking to sell clothing and other products at your gym or on your website? Are you wanting to create additional revenue through selling custom merchandise? If so, you want your items to look high-quality and hard to resist! With a correct print file, the better your product will turn out! It’s essential to understand the critical role of print files in product creation. Read further to learn all about print files and how to get started!
What is a Print File?
A print file refers to a digital file that contains the design or artwork that will be printed onto a physical product (like a t-shirt or water bottle). A print project typically involves creating a design, graphic or text, and preparing it for printing. Print files are normally saved in a specific format, like Adobe PDF, which ensures that the file is compatible with most printing equipment. Learn about some terminology below and begin creating your products with the perfect print file in no time!
- Print size is the size of the image as it’ll come out printed on the product. Whether it is measured in inches or centimeters, the digital image size can vary.
- Image file size is measured in bytes and shows how much the image takes up on a drive or disk. Every platform has different requirements, but a common maximum image file size is 200 MB.
- Pixels are units of measurements for digital images you see on a screen.
- Pixel dimensions refer to the total number of pixels along a digital image’s width (horizontal) and height (vertical).
- Resolution represents the density of pixels or dots in an image. For digital images, the resolution is expressed in PPI (pixels per inch). For printed images, the resolution is expressed in DPI (dots per inch).
- DPI refers to dots per inch. Digital devices display images in pixels, however printers print images in dots. DPI is calculated using your image’s pixel dimensions and image size. The higher the DPI, the more dots and the sharper the print. The lower the DPI, the fewer the dots and the blurrier the print.
Print File Guidelines
- Print file formats: PNG, JPEG
- Embroidery file formats: The best file format is PNG. JPGs are often accepted but not recommended because design elements in this format always have a background, which can make the overall design look bad.
- Print file resolution (DPI): Although it depends on the product, the resolution should be at least 150 DPI and no higher than 300.
- Acceptable content: Depending on what company you’re ordering products from; you must follow their acceptable content guidelines! If your design is hateful, illegal, or violates any intellectual property rights, it will most likely get blocked or denied.
Print File Mistakes & How to Avoid Them
Below are 5 reasons that can cause your designs to come out in low quality and how to fix them!
1. Resizing a low-quality image
- Find a new, high-quality image that is 150-300 DPI from the start.
- Settle for a smaller image than you originally wanted.
- Turn your low-quality image into a vector. Vectors are graphics of points, lines, curves, and shapes based on math formulas. Luckily, you can resize them without losing quality. Once the vector is resized, export it as a PNG file.
2. Making a Direct to Garment (DTG) design with a background that shouldn’t be there
You must avoid adding a background color unless it’s part of your design – especially for custom clothing designs. This is because the printer will print all the colors it sees in the design. For example, for the printer, a black background on a black garment does not equal transparency. It is very easy to remove the background, and many platforms can remove the unnecessary background with just one click!
3. Going overboard with the transparency
Transparency as a design element works best for all-over print (AOP) and some other products, but it might not look good on DTG. The way a transparent design will come out in DTG depends on:
- How the design was created
- The transparency level of the elements
- The color of the garment they’re printed on – whether the garment needs a white under base.
4. Removing your background wrong
Sometimes, a design looks fuzzy and low-quality because the background is removed incorrectly, leaving fuzzy edges. To avoid the fuzz, duplicate your design with the transparent background multiple times in your image editing software. The little parts you missed will become more visible, and you can easily remove the edges.
5. Choosing the wrong product for your print
Every product is different and has a different texture and feel when printed. That is why when you select products for your designs, you must think about the print placement, design elements, and whether your vision will work for the product. Remember: patterns look good as all-over prints, photographs work well as posters, and typography designs are perfect for DTG and embroidery products. When selling apparel, your designs will look slightly different depending on the fabrics and fabric blends you print on.
When creating your print file, it is vital that you stick to these print file guidelines! Knowing the terminology and specs is a must if you want your customers to be happy and satisfied with their products. Create the perfect print file in no time!